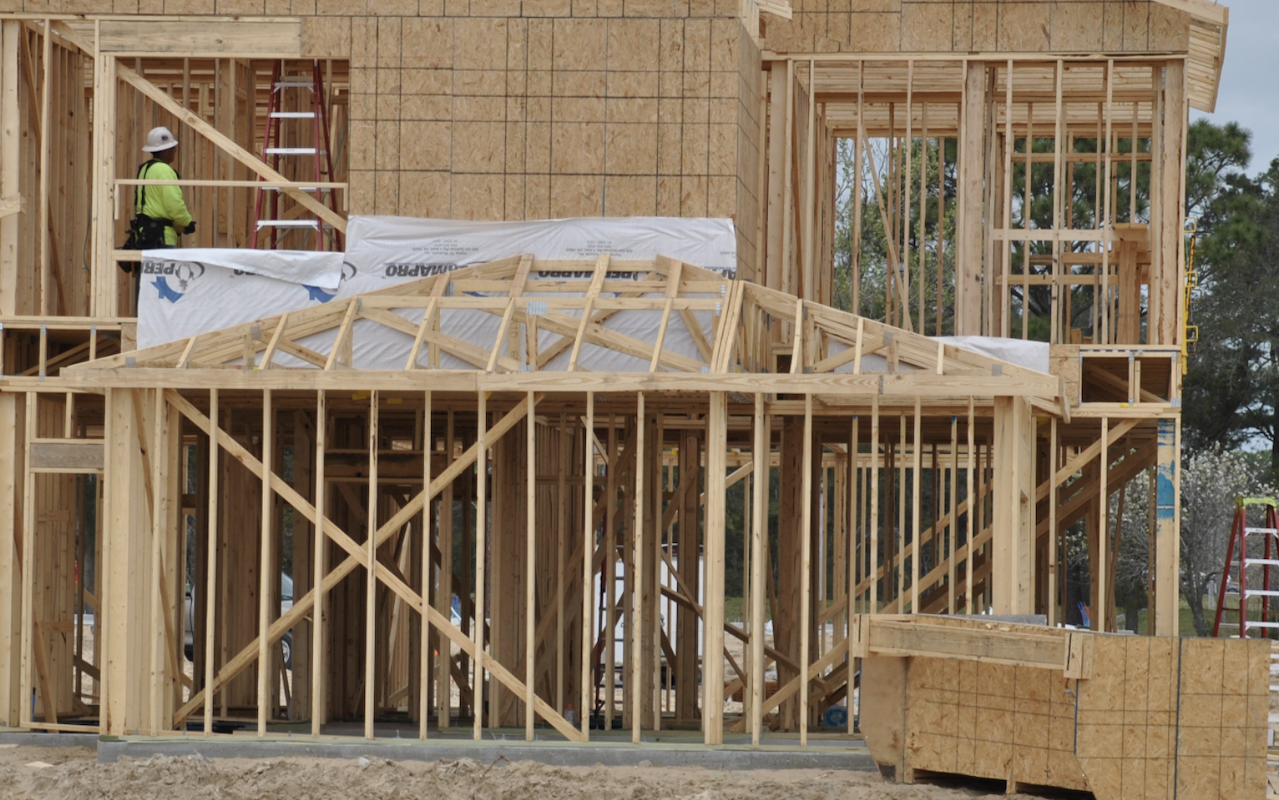
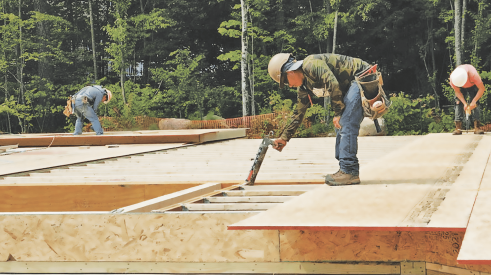
Moisture can be the nemesis of today’s more tightly-built wood frame homes. Creating a tight building envelope is just one part of the equation in creating a high-performing, energy-efficient house — if it’s not coupled with strategies for letting accumulated moisture out of wall cavities, it can be a recipe for disaster.
For several years, NAHB’s Building Product Issues Committee has tracked the adverse effects of unwanted excess moisture in homes. Most of the recurring themes have been identified to be specific to certain regions of the country and certain exterior claddings. Building code requirements have changed in response to the need for more robust weather resistance performance of exterior envelopes. Product specifications and performance requirements have changed, as well, but it’s often hard to keep on top of all the code and technology changes that are happening in the industry.
In an effort to help builders avoid the pitfalls of inadequate moisture management in wood frame home construction, the Forest Products Lab and the NAHB Research Center developed an online video resource — a series of 14 “how-to” videos that illustrate construction techniques that minimize moisture-related performance issues in the design and construction of wood-framed wall systems. The videos serve as a building science primer for construction elements that can be affected by moisture.
Here are several of the suggestions for key areas of focus for managing moisture accumulation and dissipation in a wood frame house.
What to Consider When Selecting Materials for Wood Frame Homes
When selecting construction materials, you obviously need to consider the desires of your customers and the needs of your particular climate zone. The rise and fall of temperatures within a certain range for each climate zone should be anticipated and accounted for in your material selection. Be sure to employ the right construction details based on the cladding material type selected and the climate zone. Some products retain water, others repel water. Some products allow moisture to flow through them with ease, while others retard the flow of moisture. It is critical to understand how different materials must be assembled in order to prevent moisture problems originating at the foundation, within the exterior walls, and on the roof of the house.
Foundation
Stormwater management and having a good drainage system are critical for keeping the foundation dry and ensuring the durability of the building envelope. To direct water away from the foundation at the ground surface, the site should be graded a minimum of 4 percent away from the house. Run-off from the roof should be guided by downspouts then dispersed with the help of splash blocks (typical length: 2 feet) and the site grading. To ensure adequate water drainage away from the house, a downspout extension (typical length: 6 feet) can be used as well. Run-off from the downspout should be guided to stormwater collection areas, such as swales and wet detention ponds.
Exterior Walls
There are several moisture management features built into the exterior wall of a wood frame house. A water-resistive barrier (WRB) is commonly used to protect the outer surface of wood sheathing from any rainwater that penetrates past the cladding. All exterior wall penetrations require flashing, which is designed to direct bulk water away from the wall cavity. Window openings use flashing in several locations such as the sill, the jambs, and the header. For doors, the threshold is a critical flashing location, and all utilities service penetrations need flashing.
Masonry cladding such as brick and stone manage bulk water by allowing pathways for drainage. Brick veneer is installed with a one-inch air gap between the brick and the covered sheathing surface, which functions as a drainage cavity and allows bulk water to drain through weep holes and wall components inside the cavity to dry. Stone masonry veneer products are often installed with a drainage plane instead of an air gap. The drainage plane allows water to drain behind the masonry cladding and out from the drip edge. (More details on effective brick and stone exterior installation can be found in videos 8 and 9.)
The exterior wall construction inward from the WRB is also a factor in moisture management. The effective management of heat flow, airflow, and water vapor flow through the use of insulation, air barriers, and vapor retarders can prevent the formation of water condensation within the exterior wall cavity or high moisture content in water-absorbing materials such as wood.
Roof
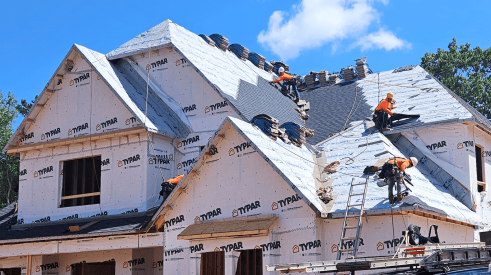
The roof has several moisture management features. Roof overhangs can protect exterior walls and foundation from excessive wetting by rain. The size of the overhang will depend on exterior wall features such as the number of windows, doors, the height of the wall, and climate conditions. To protect the roof from the weather, roofing paper or felt is installed over the wood sheathing, and depending upon the climate, an ice and water membrane should be installed to prevent water intrusion caused by ice dams.
RELATED
- How to Frame Walls That Combat Moisture
- 7 Deadly Sins: Avoid These Construction Defects, Part I
- Net Zero Energy: The Ultimate Z.E.N. Home's Wall Assembly
Airtightness of the Building Enclosure and Combatting Moisture Issues
Depending upon how the airtightness is achieved, moisture issues can arise in tighter buildings, especially when vapor retarders are used incorrectly or when the design requirements of the climate zone are not well understood. Generally, you have to consider managing the heat flow, airflow, and vapor flow within, around, and through the home; These are all interrelated and depend upon the outdoor climate conditions and the indoor environmental control systems.
Heat flow is defined by three modes of heat transfer: radiation, convection, and conduction.
Radiant heat primarily enters the building enclosure through windows and the roof, and can be reflected by radiant barriers, such as low-e windows and reflective insulating materials in the attic.
Convective heat transfer is driven by air through openings in the building enclosure. The convection can be both natural, such as hot air rising in a “stack effect,” or forced by equipment such as a fan. Air barriers (tape, caulk, foam, and other similar materials) manage heat flow by creating a continuous air barrier system and minimizing air infiltration through the building enclosure.
Conductive heat transfer occurs when heat goes through the building enclosure components from a hot environment into a cold environment. Materials with a low thermal conductivity, such as fiberglass, cellulose, and foam insulation, manage heat flow by minimizing thermal conduction through building enclosure components. To ensure good thermal resistance performance of fiberglass batt insulation, it is important to avoid compression, voids, and gaps during the installation. It’s also important to minimize thermal bridging, which provides a path for heat flow across the building enclosure through a material with low thermal resistance. This can be significant even when the area of the low-R material is small. For example, wood framing has much lower thermal resistance than insulation materials, which means it’s important to avoid over-framing the exterior walls.
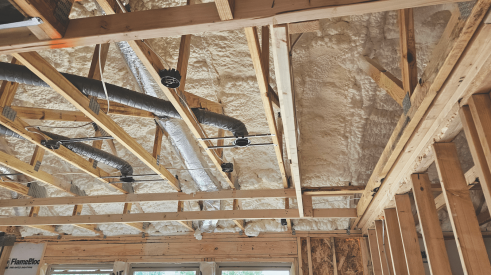
Airflow conveys both heat and moisture. Air infiltration and exfiltration can both be created by wind pressure, the temperature difference between indoors and outdoors (or “stack effect”), or the HVAC and exhaust systems. Continuous air barriers reduce air infiltration and exfiltration through the building enclosure. The highest levels of air tightness are achieved using sheet materials that block airflow, such as housewrap, drywall, or rigid insulating sheathing, combined with complementary materials that seal the gaps and penetrations, such as gaskets or tapes. Caulking can be a tedious job, but it is a necessary part of airflow management. The application of spray foam insulation provides a continuous air barrier and is ideal for locations where caulking can be difficult, such as the transitions between the foundation and the wall, roof and the wall, and unconditioned spaces, such as ceilings in a garage. HVAC and exhaust systems must also be sealed and balanced to minimize the pressures they induce across the building enclosure.
Vapor flow through the building enclosure occurs by airflow or diffusion. The rate of vapor transport by airflow depends on the air pressure difference between indoors and outdoors, the airtightness of the enclosure, and the water vapor content of the air. The rate of diffusion depends on indoor and outdoor relative humidity and temperature, and the permeability of the building materials.
Keep in mind several key principles related to diffusion of water vapor. First, the building enclosure needs to be protected from significant moisture sources (for example, use vapor retarders with very low permeability rates on the ground in crawl spaces to minimize water vapor migration from the ground into the house). Second, moisture should not be trapped within the building enclosure between impermeable membranes; the enclosure needs to be able to dry to either the inside or outside of the house.
Since the primary sources of indoor water vapor are in the bathroom and kitchen, you should install (and educate homeowners to use) bathroom and kitchen exhausts, and control the indoor humidity through the proper design and use of the HVAC system. An HVAC system that brings unconditioned outdoor air into the house will increase or decrease the indoor humidity level depending on the vapor content of the outdoor air. To prevent potential condensation on ductwork in an unconditioned space and improve energy performance, install the HVAC system and ductwork within the conditioned space of the house. If that’s not feasible, then ensure that the ductwork in unconditioned space is sealed and well insulated.
Flashing Systems for Wood Frame Homes
The management of bulk water (rain and other precipitation) is critical to preventing moisture issues in residential construction. Beyond the basic function of a good roof and gutter system, a home requires equally good flashing systems because this is the primary way to prevent water from becoming trapped within the building enclosure. Flashing systems promote drainage of water at construction interfaces — roof and wall interfaces, door openings, windows, utility penetrations, and the foundation. The durability of a typical residential house can be improved with good flashing practices and maintenance, like the ones described below.
Housewrap
Most housewrap products resist air infiltration and bulk water intrusion, while allowing water vapor to transmit through the material. When fastening the housewrap to the sheathing, space evenly every 12 to 18 inches and use plastic cap nails or staples to minimize the chance of the fastener pulling through the wrap during installation. In order to be effective, the vertical ends of housewrap material must overlap at least six inches, the horizontal ends must overlap at least four inches, and the lowest layer should always be under the higher layer to ensure drainage away from the sheathing. At window and door openings, housewrap must be cut, trimmed, and fastened into place at the bottom and sides.
Window Installation
To ensure proper water drainage around a window opening, start by installing sill flashing on top of the house wrap. This allows for any water that leaks on the sill flashing to flow over the housewrap and out; not toward the sheathing. Next, apply caulk to the window flange area to seal the perimeter during installation. Then be sure the jamb flashings are installed extending slightly above the window, covering the sill flashing below the window, and are covered by the head flashing. Finally, fold the housewrap over the head flashing and tape it to ensure that all flashings are properly overlapped in a shingle fashion. Air-tightness of the window assembly is ensured by installing tape, caulk, or foam around the window perimeter from the inside.
Door Installation
To minimize moisture intrusion, ensure proper flashing at the threshold. Flexible flashing is recommended. Additional moisture prevention steps can be taken when the exterior around the door entry is being completed. Roof covering is also critical to minimize the effects of water intrusion at the door opening.
Created in 1964, the NAHB Research Center is a full-service product commercialization company that strives to make housing more durable, affordable, and efficient. The Research Center provides public and private clients with an unrivaled depth of understanding of the housing industry and access to its business leaders.
Advertisement
Related Stories
Quality Matters
5 Ways to Silence Squeaky Floors
Take these tips to heart to deliver quiet floors and satisfied homeowners
Quality Matters
Tips for Placing HVAC Ducts in Conditioned Space
See how putting HVAC ducts inside conditioned space in a home benefits both the builder and the homeowner
Quality Matters
Don't Underestimate the Importance of Roofing Underlayment
Regardless of which product you choose to use, installing a roofing underlayment will help ensure the roof system withstands the elements and the home stays dry


