9 Common Subfloor Installation Mistakes—and How to Avoid Them
One of the benefits of OSB panels is simple installation. Familiar tools, straightforward methods, and a small bit of attention are all that’s required to ensure a solid subfloor in everyday applications.
Still, as with any product, missing steps or not following instructions when installing can lead to mistakes. And in the case of installing subfloors, those mistakes can mean movement, buckling, squeaks—and potential callbacks.
Here are a few of the most common mistakes installers make with OSB when installing subfloor and how to avoid them. As always, refer to the manufacturer’s installation instructions for complete details.
How to Install a Subfloor: Avoid These Common Mistakes
1. Improper Spacing Between Panels
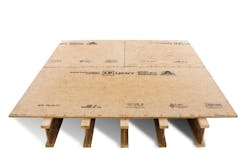
Like any wood product, OSB will expand and contract after installation; without a small gap between panel ends, the expansion could cause buckling. Most manufacturers recommend 1/8 inch at panel ends and edges. For some premium subfloors, 1/16 inch may be enough along panel edges, so refer to the installation instructions. Panels with tongue-and-groove sides will self-gap, as long as they’re not pressed together too tightly (don’t force or hammer TNG sides together).
Alternatively, don’t leave too much space. If the spacing is wider than 1/8 inch, it could lead to movement and noise.
2. Subfloor Panels Installed Upside-Down
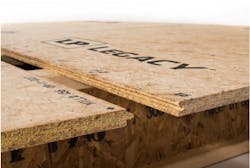
Panels may be sanded on one or both sides. In all cases, the detailed panel trademark stamp should be installed downward so they can be examined during inspections. Installing some panels with the trademark side up may result in a slightly uneven surface.
RELATED
- Building Homes That Deliver Form and Function Starts With This
- Construction Quality Assurance Program Fundamentals
- Subfloor Best Practices
3. Improper Fastener Placement in Subfloor Panels
Fasten panels using 8d ring-shank nails or other code-approved fasteners. Install fasteners beginning 3/8 inch from panel corner and then 6 inches on-center along the panel edges, and at 12 inches on-center along center supports. Be sure to place all perimeter fasteners 3/8 inch back from the nearest panel edge; this will help reduce the chance of edge swell.
4. Gluing Too Far Ahead
For efficiency, many installers prefer to lay down several panels’ worth of glue at a time, but the time delay could cause the adhesive to skim over, affecting its strength and potential noise. For best results, work no more than one panel ahead.
5. Not Gluing the Subfloor's Tongue-and-Groove
Applying a small bead of glue in the tongue-and-groove can significantly help reduce any movement and noise.
6. Delaying Fastening the Panels
Again, it’s tempting to tack the corners and come back to screw all the panels down at once. But by then the glue is already set. Fasten each panel fully as you go to ensure full adhesion and avoid movement and noise down the road.
7. Using Improper Fasteners
Using code-approved screws rather than nails is the best option for avoiding movement. If using nails for subfloor installation, stick with ring-shank nails; smooth nails may withdraw easier, leading to squeaks.
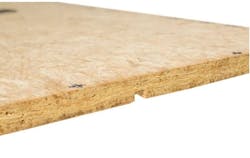
8. Letting Water Sit on Subfloor Panels
If the floor system is exposed to the elements and bulk water is present, sweep it off or drill drainage holes. Some subfloor panels come with built-in notches to help drain water.
9. Improper Storage of Subfloor Panels
Always store panels in a clean, dry area and off the ground. If possible, store panels indoors. If stored outside, cover panels with plastic sheets or tarps. Keep cover open and away from the sides and bottom of the panels to allow for air circulation. Space units at least 4 inches on all four sides. Protect edges to avoid damage to the tongue-and-groove profile.
A well-installed subfloor is one that homeowners don’t have to think about after they move in. Avoiding these common errors can help ensure your flooring system is stable, quiet, and reliable for years to come.
About the Author

Allan Burk
A licensed Civil Engineer specializing in wood engineering, Allan Burk is the Supply Chain Planning Manager for LP Building Products’ OSB and EWP business. He has worked in R&D, manufacturing and sales throughout his career in the building products industry.