4 Tips & Tricks for Proper Window Flashing

Across the building envelope, windows are often the most vulnerable areas and the most frequent points of failure. But it doesn’t have to be that way.
Careful planning and detailing of the weather resistive barrier (WRB) and window flashing using best practices based on building science and by following manufacturer recommendations can help protect the openings against moisture intrusion.
But beyond the generally accepted (and science-based) best practices for window flashing, it’s also important to consider the window’s material, shape, and size as well as whether the wall system will include continuous exterior insulation.
1. Are Materials Compatible?
In general, what the window is made of (wood, fiberglass, vinyl) doesn’t impact how you flash it. But it can influence the flashing material you use.
In selecting flashing, it’s important to ensure product compatibility with all other materials it will contact. For example, some window manufacturers state that asphalt-based flashing tapes should not be used with their PVC nail flanges.
In addition to the window itself, also be aware of the flashing tape’s compatibility with the sealant used behind the nail flange. Some sealants may react poorly with either the flashing tape, the WRB, or the window components, including its finish coating.
2. Flanged vs. Non-Flanged Windows?
Windows typically fall into two basic categories: flanged (those with a nailing fin) or non-flanged (those without a nailing fin, often used for retrofit projects). But there are key differences within those two categories.
Flanged windows can be designed with integral or non-integral nail flanges, and the difference can affect the way the window needs to be flashed.
Windows with a non-integral nail flange may call for flashing onto the window frame, whether with a flashing tape, liquid-applied flashing, or a combination of both. Some window manufacturers also specify a double bead of sealant behind the nail flange.
A non-flanged window may rely on beads of sealant or liquid-applied flashing, and using a backer rod with the sealant is essential.
This detail also can become more difficult to inspect if the window unit is being pre-cased and requires the exterior sealant bead to be detailed from the interior. Check with your local building department and inspector to clarify and comply.
Pro Tip: Contractors should always refer to window installation instructions for specific direction, including details such as barrier versus drainage methods.
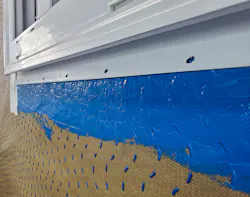
Work with representatives from both the window manufacturer and the flashing manufacturer to determine the flashing methods that are most efficient, effective, and easily repeatable for the installation crew.
There is more than one way to properly flash a window, but what may work for one crew may not work for another.
3. What About Specialty Shapes?
Round or arched windows are notoriously tricky to flash, so consider a liquid-applied flashing, which spreads easily around curves and other geometrically challenging areas.
Straight flashing tape can be used but may require a lot of cutting and trimming. A liquid-applied option is much more time efficient and results in a continuous seal against water and moisture intrusion.
4. How Should I Flash When Exterior Insulation Is Present?
When the wall system includes continuous exterior insulation, the added thickness of the exterior foam boards puts the water control layer for the window units on a different plane or surface.
That assembly creates a challenge to connect the water control layer with the window and deliver a continuous, secure drainage plane.
In this instance, flashing best practice depends on whether you are dealing with an “innie” or an “outie” window.
For an innie window, you’ll need larger pieces of trim or metal to make up for the extra wall thickness, typically 2 inches or less.
Depending on the window, the most straightforward approach is to install the housewrap on the structural sheathing, in line with the window, and then use a traditional flashing application approach.
For an outie window (which typically will have the window rough opening framing built out to be in line with the outer plane of the insulation, often referred to as a “buck out”), installers have two options:
The first option is to install a WRB over the exterior insulation panel, thus keeping that layer and flashing detail in line with the window.
The second option is to install a drainable housewrap between the structural sheathing and the continuous insulation panel, which gives incidental water or moisture a path to drain away from the wall.
If the WRB is installed against the sheathing and then you install a window buck, the window framing plane is now flush with the insulation board, projecting out from 1 to 3 inches away from the WRB.
In this scenario, flashing the window with straight flashing materials and methods requires careful attention to proper sequencing, namely working from the bottom and shingle-lapping to the top, and maintaining continuity where the housewrap ends and the flashing then continues as that control layer.
Liquid flashing also is an option for these applications because—compared with flashing tapes—it is easier to create a monolithic seal and be more precise when managing the more complex intersections and angles created by the exterior insulation.
That being said, be sure to verify compatibility between the liquid-applied flashing and the other products it will come in contact with.
About the Author
 Nick Johnson
Nick Johnson
Nick Johnson is a technical support specialist at Benjamin Obdyke, a building envelope manufacturer headquartered in Horsham, Penn., that supplies Hydro Flash LA, a liquid-applied flashing. In his role, Nick provides building science expertise and installation advice to home builders and contractors, and authors educational articles on optimizing building enclosure systems.