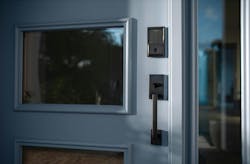
As homeowners become increasingly well-versed in smart home technologies, they’re opting for connected solutions when it comes to one of the most important aspects of their homes: security systems.
Smart locks offer consumers peace of mind with the convenience of locking doors from any location through wireless connections. This allows owners to check on their property remotely and manage access with ease, and puts an end to the all-too-familiar question, “Did I lock the door before I left home?”
Not only do smart locks offer convenience, but they can also integrate with other smart home technologies for an even more seamless experience. For example, home security and access provider, Schlage partnered with electrical device manufacturer Leviton to pair the Schlage Encode™ Smart WiFi Deadbolt with the connected lighting functionality of Leviton’s Decora smart lighting control line. This means that end users can trigger lighting activity associated with lock activity for improved home safety, security and convenience. Schlage locks can also pair with home systems like Alarm.com, Apple HomeKit and SmartThings.
Whether it’s a homeowner’s first smart home product or just another tool in their modern and connected home, today’s smart locks are easier than ever to install. And for the technologically-challenged, home security manufacturers are making it simple for end users to set up their systems without expert guidance unless support is requested.
Installing a smart lock
Before the installation process, it’s important to research and zero in on the right home security system for the application. To help customers find the right smart lock for their needs, Schlage offers a quick quiz on its site. Things to consider before making a purchase include: style and finish, specific security needs and any other home systems that will be syncing with a new lock.
Once the proper smart lock is selected, installation can begin. While the advanced nature of smart technology may make installation sound intimidating, the process is simple. Setup generally breaks down into two easy steps: smart home hub pairing (if desired) and hardware installation—which requires only a screwdriver and tape measure.
The first step of hardware installation is to make sure the door is properly aligned and prepared with the right holes. Key measurements include the below:
- A minimum of 5 inches between the center of the deadbolt hole and the center of the door latch below
- The crossbore diameter measures 2 ⅛ inches or 1 ½ inches
- The backset measures 2 ⅜ inches or 2 ¾ inches from the door edge to the center of the crossbore
- The latch bore measures 1 inch in diameter
- The door is between 1 ⅜ and 1 ¾ inches thick
- The hole drilled in the door jamb is at least 1 inch deep
After verifying these measurements, hardware installation can move forward following instructions provided with the lock. There are also interactive instructions at Schlage.com, simplifying the process even more. Because the lock is battery operated, there’s no hardwiring—and no electrician—necessary. With the smart lock and new batteries installed, the user can test the lock and experience for themselves the convenience, security and style that come when they trust their home to Schlage.
If interested in learning more about smart lock capabilities and installation, visit Schlage.com.

